
Oh my god. I'm so impressed i can't say anything else, but to watch this yourself.
[LINK]
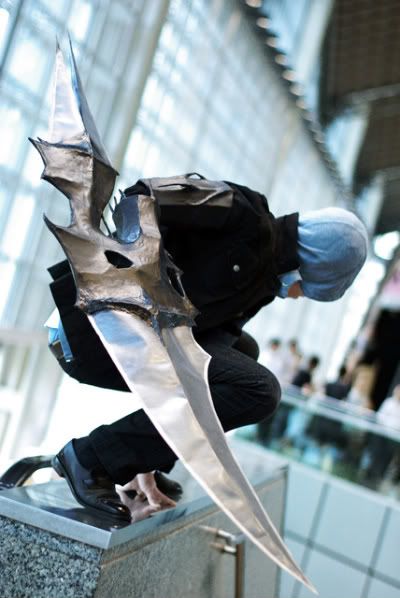
[PROTOTYPE]
Games Convention Asia 2009, 19th September, Suntec City
Photo credits to Kirmu. Thanks for the ub3r shots!
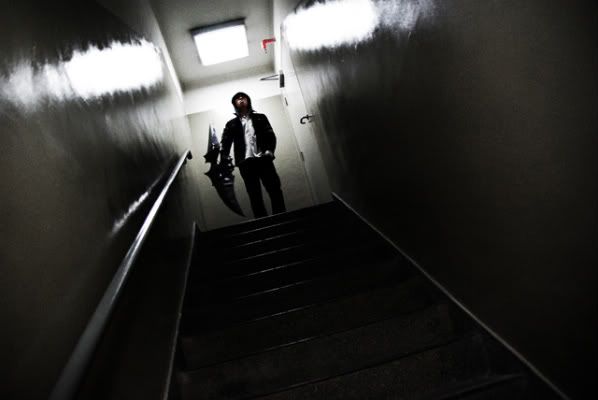
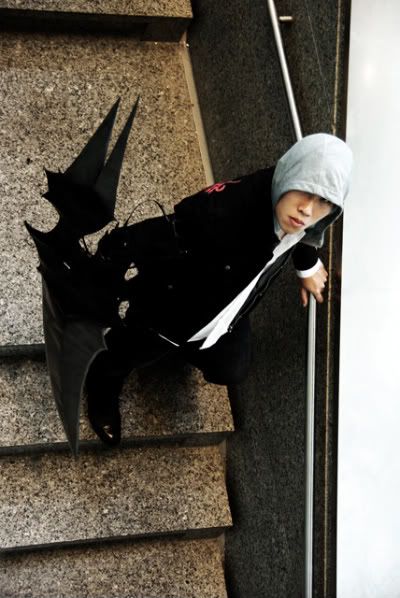
Did this one out of randomness. It just screamed it, and i couldn't help but add it in LOL.

Photo credits to Kirmu. Thanks for the ub3r shots!


Did this one out of randomness. It just screamed it, and i couldn't help but add it in LOL.

The Blade arm

I just realized i have 17 Days to finish this. Omgwtf.
PART I - THE BLADE
Using all the measurements I made (that took forever... forgot all my math) I draw and cut out the 2 blades. I also measure out a centre line, and score along it, giving me a nice fold.

I cut strips of craft foam and line the edges, leaving a gap of 1cm. This is to ensure the edges don't get too flat once i glue the entire structure together. (got this idea off The Prop Blog. Extremely useful resource for budding props makers)

Using the measurements, i cut out pieces of craft foam for the main structure, and reinforce it with wire. I make a total of 3 in different sizes and glue them onto one side of the blade...

... As seen here.

Once that is done, i slap on the other side, and slowly glue it on. I start with the outer edge of the blade, applying by segments so as to prevent the glue from cooling too fast. After the outer edge is done, i proceed to glue the structure at the center, and then finish off with the inner edge. Oh, i also save the tip for last, as it is sorta glued flat right at the point. (Ignore the dent at the bottom, it dropped off the table whilst i was taking the picture ._.)

And... standing on my table. Oh, and i also use the exact same process to make the other part of the blade, the 2 smaller ones on the top. No pics for that, since it's the same ol' thing over again.

Using wire, I slowly (and painfully... it's friggin sharp edges caused me much distress) make the structure for the centre part. I did not take photos of this entire process as it's rather self explanatory. It's very important that measurements are made properly at this point, don't wanna end up having the sizes all wrong.

Here's another shot of it, but on the floor, for a clearer view.

After that, i start attaching the blades onto the main structure. This part is tricky, and takes some precision work, thus, no photos. But here's one of what it looks like when i'm done.

Tried it on, just to make sure the size is correct. Looks good so far. Just needa slap on the surfaces.

At this point, i realize one problem. Compared to the original, the 2 smaller blades on my current structure are too bent inwards. Exactly what happens when one forgets to check with reference occasionally ._. I fix it, and begin to wrap the empty structure with masking tape. The masking tape layer will be the base layer for the later paper mache layers. Here's what it looks like with the tape on.

For the first layer of paper mache, I use brown paper, the kind used for wrapping mail packages. It's way stronger than newspaper, and more durable when it hardens.

I use newspaper for the next layer however, so as to allow me to distinguish the layers. I'm planning for a total of 5 layers, which should be durable enough to withstand some punishment. (I hope)

5 layers of painstakingly slow paper-mache-ing later... I start putting on the little details using paper clay. It's an air-drying clay, so no heat required. It tends to crack when drying tho, so i patch them up with more clay everytime it does.

After it sets, it's on to the paint job. I spray a generous coat of black all over the center portion, and give the blades a small coating of gunmetal grey. I weather the blade a little using some black paint, giving it some texture, and use a silverish grey to mimic a sharp edge on the blades. Once the paint dries, i give it a quick coat of acrylic varnish to protect it a lil'.

With the blade arm almost ready, i also take the time to work on the rest of the costume. The jacket was an ordinary black one, added on the stripes and the tribal-decal-thing on the back using T-shirt transfers (which cost a bomb btw). I had to dye the hoodie a little to get the correct shade of grey... although it came out looking only a little darker. Nvm, doubt anyone would notice it.

And that's about it. Didn't take anymore pictures from this point on.
Stay tuned for pics of it in action!
The Resistance
THE RESISTANCE
Uprising
United States of Eurasia / Collateral Damage
cantwaitcantwaitcantwaitcantwaitcantwait
Uprising
United States of Eurasia / Collateral Damage
cantwaitcantwaitcantwaitcantwaitcantwait

